Sunday 21 September 2014

Pogaca.....sort of

So yesterday I did some more #sundaybaking and decided to make something my sister had made which looked very tasty. Steve helped me with these and we went a little off piste but the results are fantastic! The recipe was inspired by this one http://www.giverecipe.com/fluffy-pogaca.html and in the next few weeks I will try giving the real thing a go.
One great thing though if you could really use any fillings you wanted next time I'm going to try feta and olive, and maybe some goats cheese and onion chutney yummy!!


Dough:
4 cups bread flour plus extra for work surface and trays
¼ cup warm milk
1 tbsp dry instant yeast
½ cup vegetable oil
1 tbsp sugar
1 tsp salt
¾ cup warm mineral water
For its filling: (I used two different fillings but you could use anything you want!)
feta cheese
pinch individual rosemary 
chilli flakes
1 red chilli finely sliced
2 slices smoked bacon
1 garlic clove
½ tsp english mustard 

Method

Dough:

In a jug combine the milk, yeast and sugar, mix well then add the oil. Cover with cling film and leave to ferment for about 10-15 minutes.
Place flour and salt in a large mixing bowl, mix together.
When the yeast mixture is ready make a well in the centre of the flour and pour in the mixture. Start to combine using a spatula then with your hands. Do not overwork this dough like a regular bread dough. Once combined it should be a non sticky dough not too dissimilar to pastry dough. Leave the dough in the bowl covered by a warm damp teatowel for 45 minutes.
Meanwhile make your fillings. We decided to make two. For the first crumble the feta with a pinch of red chilli flakes, a few more if you like a punch of heat. For the second in a blender blend the bacon, mustard, small amount of salt ad pepper and garlic clove. Whizz up till you have a smooth paste. Pop the paste into a bowl, lightly flour your hands and roll into balls. 

Once rested the dough will have risen and look slightly paler in colour.
Divide up the dough into however many pieces you would like we did a few large and a few medium sized but do whatever you like! Lightly flour your hands and work surface if needed and shape each piece of dough into a flat disk, pop some filling in the centre and add a few pieces of resemary and a bit of chilli, we did this in the cheese and bacon balls. Pinch up the edges of the dough to form the ball and twist, placing the joined bit down on a floured tray. Repeat with the rest of the dough and your fillings. Finnish with a brush of milk or egg yolk if you like. Steve made a few other different shapes so experiment!
Bake in the oven for 15-30 minutes depending on the size until golden brown.
Continue Reading...

Monday 15 September 2014

Cobs and Loaf

Decided I needed to get my bum into gear yesterday and get baking again!! I decided to go with something simple to go with a pie I did for tea. 
This recipe was super easy and hardly takes anytime at all and I will be using it a lot more! It was enough for a small loaf and about 7 small rolls. A few of which are missing as they were un resistible straight out of the oven slathered in butter! 


600g strong white bread flour plus extra for dusting
500ml lukewarm water
1 sachet fast action yeast
1 table spoon sugar
1 teaspoon salt
25g soft butter

In a jug combine water with yeast and sugar. In a large mixing bowl add the flour, salt and butter, mix and run in the butter. Push the flour to the outside of the bowl to make a well for the yeast mix to go in. Pour in the yeast mixture and slowly combine with a dinner knife until combined. Place the dough onto a floured surface and kneed u till smooth, usually takes 10-15 minutes.

Flour the bowl that you made the dough in lightly to coat the bowl and place the dough into the bowl and cover with a teatowel. Place in a warm area for about 1.5 hours or until doubled in size. 

Once ready place the dough on your work surface and knock back the air and divide into two pieces, on piece about a third of the loaf for the cobs and the two thirds section for the loaf. Shape the larger piece and put in lightly dusted loaf tin and split the smaller piece and roll into the desired amout of cobs, placing these on a flour dusted baking tray. Cover again with a teatowel and leave in a warm place again for about an hour until they have risen again.

Once ready dust the loaf and cobs with flour and place in a pre heated oven at 180. The cobs will take about 10-15 minutes and the loaf about 30 minutes depending on the oven. To test to see if they are ready lift a cob or the loaf and tap the bottom of it. If it sounds hollow it's ready :)

Serve and enjoy!

Continue Reading...

Thursday 15 May 2014

Pumpkin, Cheese and Rosemary Scones


These scones i have to say are pretty amazing if you want to try something a little different!  I have only tried the recipe with cheddar cheese but i bet goats cheese works amazingly! THIS I will be trying out soon!


250g plain flour (plus extra for dusting the cutter in)
3 1/2 teaspoons baking powder
1 teaspoon salt
1 tablespoon honey
120g cold butter, cubed
200g pumpkin puree (cold and drained though a sieve
100g grated cheese
1 tablespoon finely chopped 
1 egg yolk for egg wash

Preheat oven to 200c and line a banking tray with baking paper. In a large bowl combine the flour, salt, baking powder. Add the butter (which must be very cold. I find that after cubing it pop it in the freezer for 5 min to re-chill) to the mixture and rub together until you have a mixture resembling breadcrumbs.
Then add the rest of ingredients to the flour mixture and combine by hand until well combined. Ensuring you don't overwork the dough. once combined shape into a ball then flatten till the dough is about one inch thick. 
Using a large circular cutter dip the cutter in flour and gently press into the dough making sure not to twist the cutter. When all the surface has been used reshape the dough to continue to cut.


Lay the scones on the banking tray. Whisk up an egg and brush over the scones. If you want an extra cheesy hit grate a little extra over the scones.
Bake the scones in the centre of the oven for about 15 minutes until risen and golden.


Continue Reading...

Friday 22 November 2013

Chocolate Mint Cupcakes

Chocolate Mint Cupcakes


Makes 12 Cupcakes

100g plain or all-purpose flour
20g cocoa powder
140g caster 
1 ½ tsp baking powder
a pinch of salt
50g unsalted butter, softened
2tbsp Creme de Menthe 
120ml milk
1 egg

For the Mint Buttercream:
250g icing sugar
85g unsalted butter, softened
25ml milk
50ml Crene de Menthe (more or less to taste)/few drops mint extract
3 squares Dark chocolate plus extra for topping, finely grated
Silver Edible cake glitter I grated dark chocolate


Preheat oven to 170c/GM 3 and line muffin tin with large cupcake cases.

With an electric mixer beat the butter and sugar till well creamed.

In a separate bowl add flour, coco and baking powder. And in a jug beat the egg till frothy and and add the milk.

Sift a third of the flour mixture into the butter and sugar and mix. Then while mixing add a third of the milk mixture. Keep adding the ingredients alternately until all combined.

Continue to beat till mixture slightly lightens. When ready add the Creme de Menthe/mint extract and mix in with a spatula. If you want it more minty add more but the icing has plenty so not too much is needed. You can also keep the sponge mint free if you like and just have the mint frosting.

Spoon the batter evenly between the cake cases and bake for 20-25 minutes until springy and a sharpe pointed knife comes out of the cake clean.

While the cake is in the oven it's time to make the frosting.

Mix the very soft butter and milwith 1/4 of the icing sugar and add a few drops of the Creme de Menthe/mint extract and use an electric mixer to beat. Continue to add all the icing and beat until light and fluffy. Add more mint to taste. If using extract add a few drops of green food colouring if desired. Once ready grate in  the chocolate and combine with a spatula. 

Put into a piping bag with your desired piping nozzle. 

Once the cakes come out I the oven leave to cool for ten minutes and transfer to a wire cooling rack. When completely cooled pipe the icing in your desired design and sprinkle over more grated chocolate and the glitter.

Continue Reading...

Wednesday 23 October 2013

Roasted Pumpkin Seeds


Good morning!!! So I thought I would share what to do with those left over Pumpkin Seeds.
They are super easy!

Ingredients

-Pumpkin Seeds
-1 Tsp Cinnamon 
-1 1/2 tsp Smoked Paprika 
-1 tsp Cayenne Chilli powder
-1 tsp Flaked Sea Salt
- 2 tbsp Olive Oil

Method

First of all wash the pumpkin seeds in cold water in a sieve. Lay out on a tea towel. Fold the tea towel in half an rub to dry the seeds. Lay the seeds on a flat baking tray and pop in the oven on 180• for 2-3 min until completely dry. 

Take out of the oven and sprinkle the spices and salt over the seeds. Mix well, then drizzle over the olive oil and mix well again. 

Lay the seeds out evenly back on the baking tray and roast at 180• for 10-20 min until the seeds are golden and a little puffed up.

Delicious eaten warm or cold. Keep in an air tight tub for up to a week.


Continue Reading...

Friday 5 July 2013

Cupcake bouquet

Good morning all!! Wow the weather has finally picked up! Bring on summer! So I thought I'd do a quick post to share what me and Carly go up to on Saturday. It was her friends birthday and we made her a cupcake bouquet! The idea came from the BBCGoodFood magazine and WOW! Carly made the sponge which was vanilla and orange then I did the piping. We had to change the piping as we couldn't find the 5 point star nozzle that was recommend by the recipe. We did buy another wired nozzle after watching some YouTube videos on how to pipe flowers but it was a disaster. The using for the recipe was rubbish so we just went with a colored butter cream. I'd anyone knows of a good video or something that can teach me how to pipe flowers and other things please let me know! As time was running short I went for the usual swirls and it was pretty effective once all put together. Carly's friend Cat helped do the leaves and took the pictures that I have used, thank you!
If anyone would like me and Carly to make something like this for you please contact me. We can do a number of colours/flavors in this design and a selection of other ideas and savory cupcakes that i will be posting on a cupcake page on here soon :D


Continue Reading...

Wednesday 31 October 2012

HAPPY HALLOWEEN !!


Happy Halloween all!! I'm so excited it is my favourite time of the year!! Sad thing is I'm not really celebrating it properly until Saturday. But that's ok because me and Carly are carving our pumpkins tonight!!
I've just realised it been a while since my last post tut tut! I have been rather busy! 

Today I sorted out our living room table bowl...


So Last weekend Carly, her mum Carol and I did a Car Boot Sale again. This time it was totally AWFUL ;(
On Saturday we spent the afternoon making Halloween Cupcakes to sell at the car boot and had a bit of a mare making Orange coloured frosting. Please note DO NOT mix red and yellow food colouring liquid (the cheap stuff from the super market) until you nearly have your colour!. You will use too much and it WILL taste FOUL as we discovered. So we had a trip to our local Cake Baking shop and got Orange food colouring gel, which is totally amazing. 


This is with Orange Gel, AMAZING :D

So we made some super cool as Cupcakes and were really chuffed with them. 

Sunday morning we got to the Car Boot and set up and made everything look really pretty. We even now have Cupcake Cases to sell them in and keep covered from germs. Everything was all nice and lovely until the table opposite us was a Cupcake Stall!! We found out the Car boot was in fact a Car Boot mixed with 'Market Stalls'. Which we were not happy with at all! We weren't there to make a living from the Cupcakes we are doing it for fun but she was there to making a living and we were soooo angry! At the end of the Car Boot we only sold a few which was very disheartening, but we will come back next year bigger and better than ever and bucks Car Boots wont know wha's hit them!

My Handmade Aprons


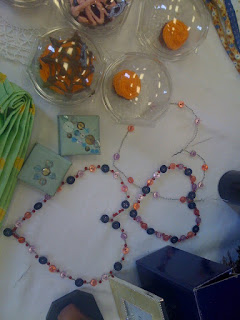
Cute Button Hearts with my little Handmade books and Our Cakes

CAKE!!
Chocolate sponge with homemade jam filling and orange coloured frosting with a homemade spider/web on top.
Red Velvet Sponge with home made strawberry jam filling and homemade fluff topping and our jam to make it look like brains :D


Continue Reading...

Followers

Follow Me on Pinterest

Follow The Author